Introduction
For those using Salesforce, you can enable SSO in your learning platform through a Salesforce identity. The configuration detailed throughout this article refers to the Salesforce V2 Integration. Read this article for info about SSO in conjunction with Salesforce V3 integration.
Please note that you must already have the SAML app activated in your platform.
Please note: Docebo does not provide support for Salesforce or other third party technologies implementing the SAML 2.0 protocol. This article is intended only as a set of best practices for IT administrators. Docebo cannot be held liable for any damage or malfunctioning due to an incorrect Salesforce configuration.
Step 1: Configure your Salesforce Identity
Salesforce Identity connects your Salesforce organization users with external applications and services, while providing administrative tools for monitoring, maintaining and reporting user applications and authorization. It’s available in: Salesforce Classic, Enterprise, Performance, Unlimited, Developer, and Database.com Editions.
Start by setting up My Domain (Set-up -> Domain management -> My Domain). Here, insert your domain name and check it’s availability, then register your domain. Once registered, press the Click here to Login button, then select Deploy to Users.

Now, you need to enable SSO (Setup -> Security Controls -> Single Sign-on Settings -> Federated Single Sign-On Using SAML). Once you’ve reached the page, select the Edit button, then enable SAML.

Step 2: Configure Connected App
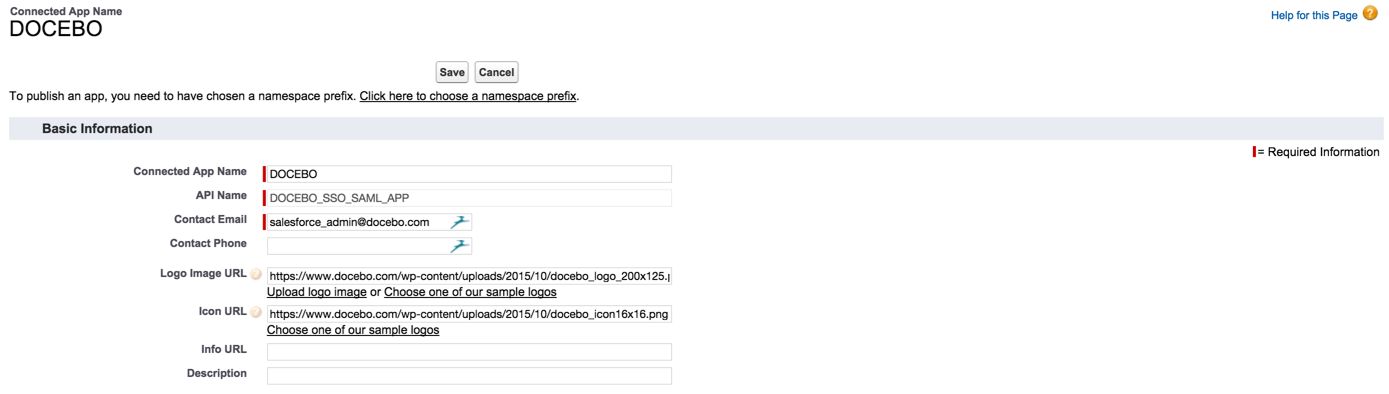
Now, you need to configure the connected app in Salesforce (Setup -> Create -> Apps -> Connected App -> New).Once you’re pressed the new button, insert this basic information into the corresponding fields:
- Connected App Name: DOCEBO
- API Name: DOCEBO_SSO_SAML_APP
- Contact Email: SF Administrator mail
- Logo Image URL: https://www.docebo.com/wp-content/uploads/2015/10/docebo_logo_200x125.png
- Icon URL: https://www.docebo.com/wp-content/uploads/2015/10/docebo_icon16x16.png
Then, insert the following information in the Webapp Settings area:
- Start URL: [Your platform domain name]/lms/index.php?r=site/sso&sso_type=saml
- Enable SAML: TRUE
- Entity Id: [Your platform domain name]/lms/index.php
- ACS URL: [Your platform domain name] /lms/index.php?r=SimpleSamlApp/SimpleSamlApp/modules/saml/sp/saml2-acs.php/default-sp
- Subject Type: Username
- Name ID Format: urn:oasis:names:tc:SAML:2.0:nameid-format:transient
- Issuer: [Your platform domain name].my.salesforce.com

When finished, press Save.
Step 3: Download Metadata
Now, you need to download your Metadata (Setup -> Manage Apps-> Connected App -> DOCEBO). Once you’ve reached the Docebo app page, press the Download Metadata button in the SAML Login Information section.

Step 4: Deploy Connected App to Salesforce Users
Now, you should deploy your connected app to Salesforce users (Set-up -> Manage Apps-> Connected App -> DOCEBO). Once you’re on the Docebo app page in Salesforce, press the Manage Profiles button in the Profilesarea. When finished, press Save.


Step 5: Configure SAML SSO inside Docebo
Now, you can configure the SAML app in Docebo using your information from Salesforce. Log into the platform as a Superadmin and access the Admin Menu from the gear icon in the top right corner of your platform. Then, select the Settings option in the SAML Settings section. Fill the required fields as follows:
- Identity Provider ID: Your Salesforce domain
- XML Metadata: The metadata that you downloaded from Salesforce
- Username attribute: Email
Please refer to this article for completing the rest of the SAML fields in your learning platform.

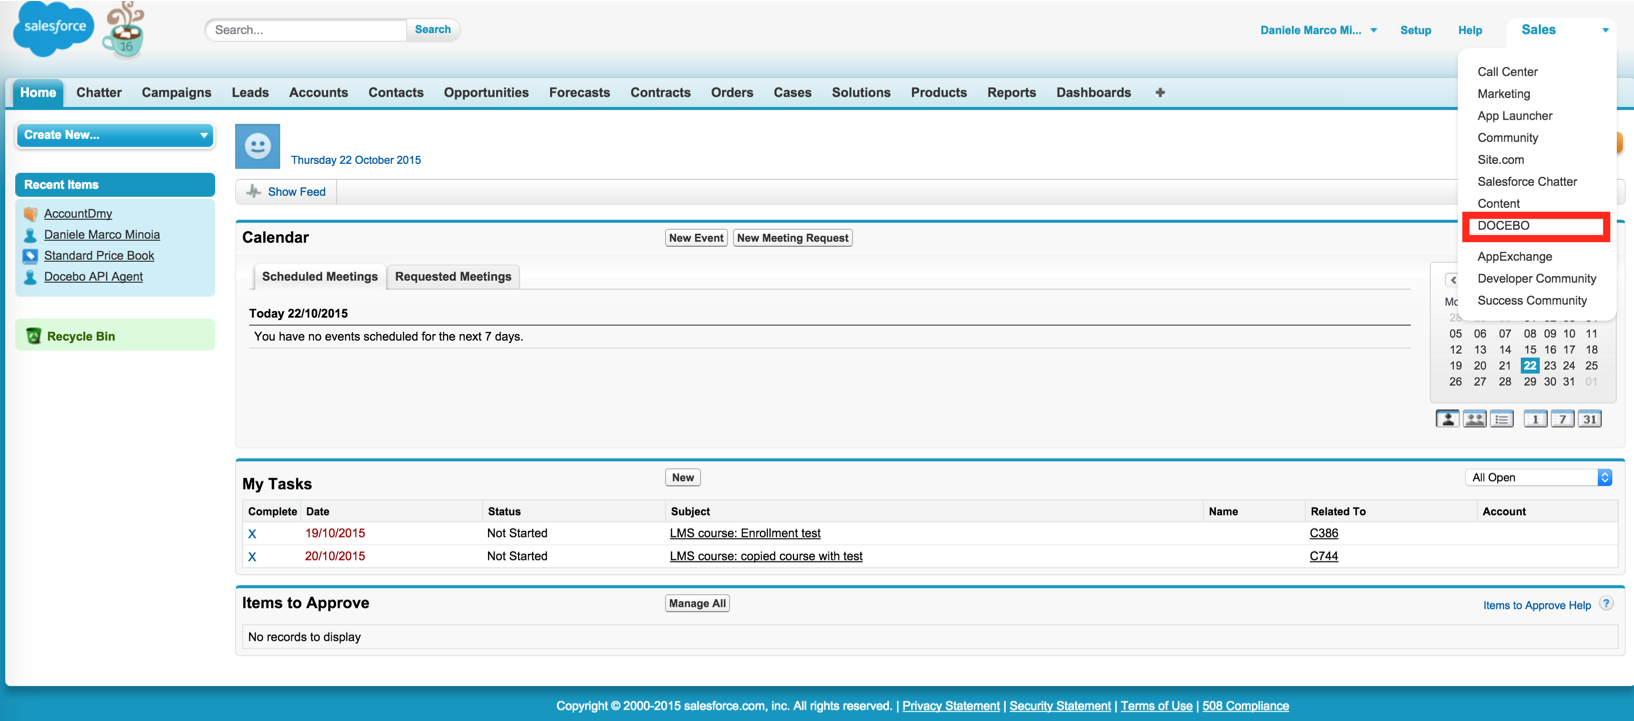
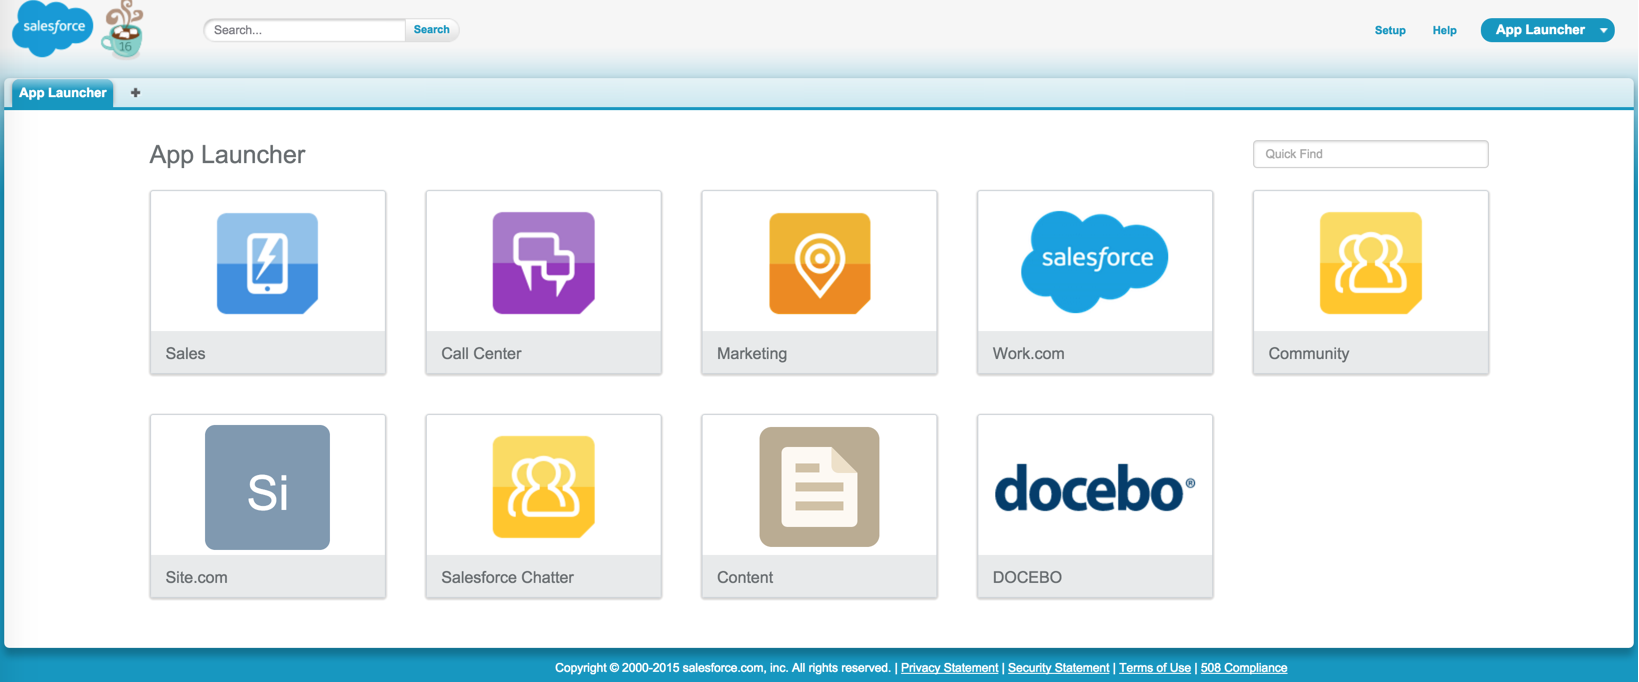
Step 6: App Launcher in Action
You’re now able to see the app launcher for Docebo directly within Salesforce. Please see the two screenshots below for examples of how the app launcher looks in the Salesforce interface:
No comments:
Post a Comment